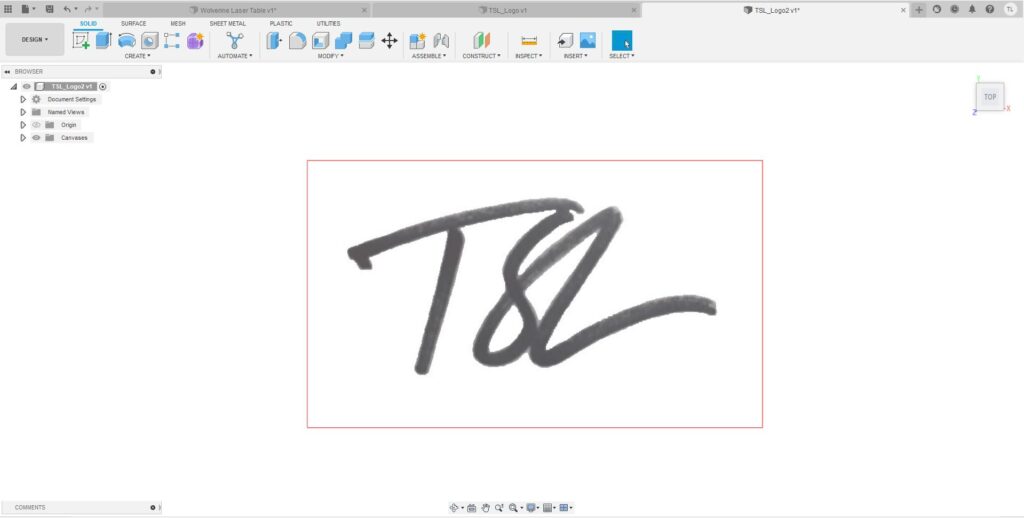
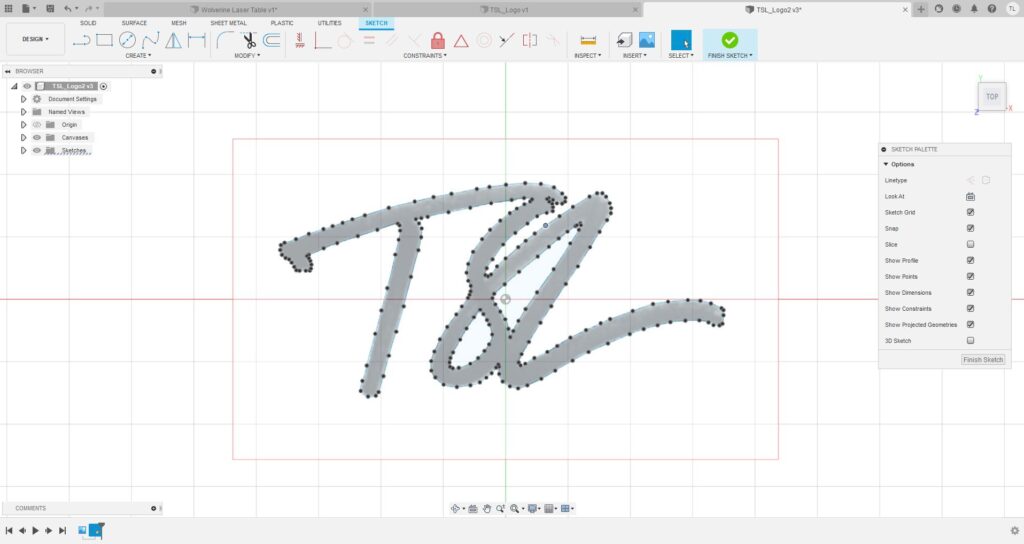
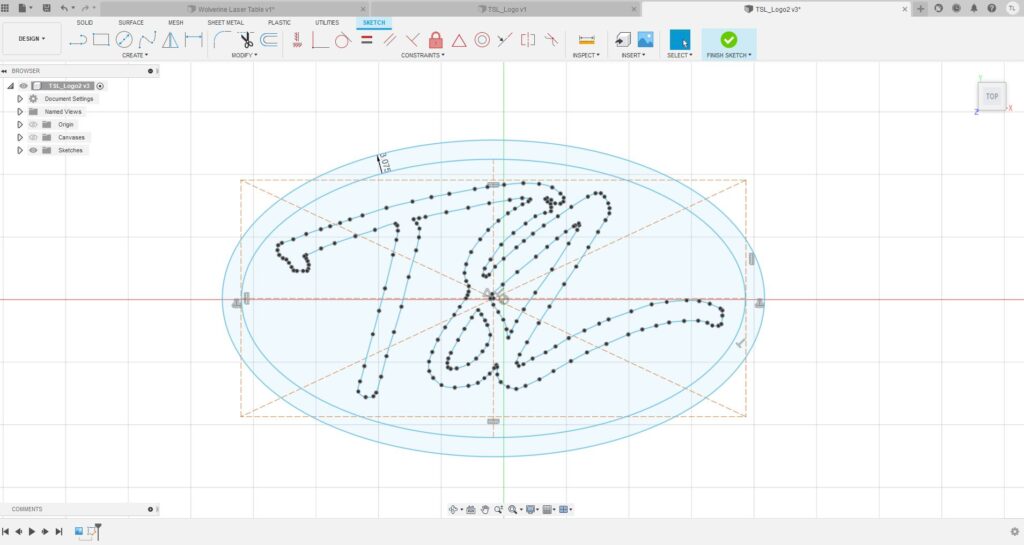
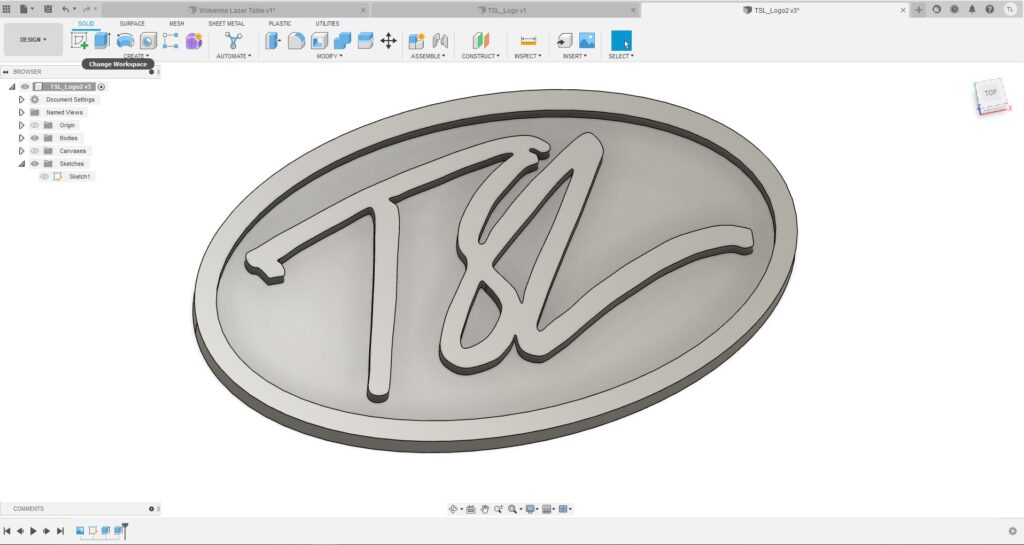
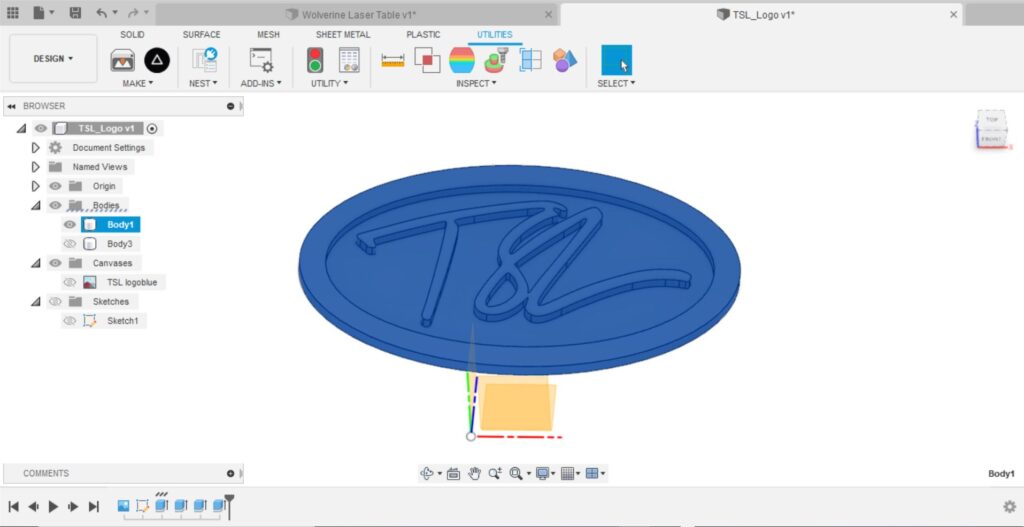
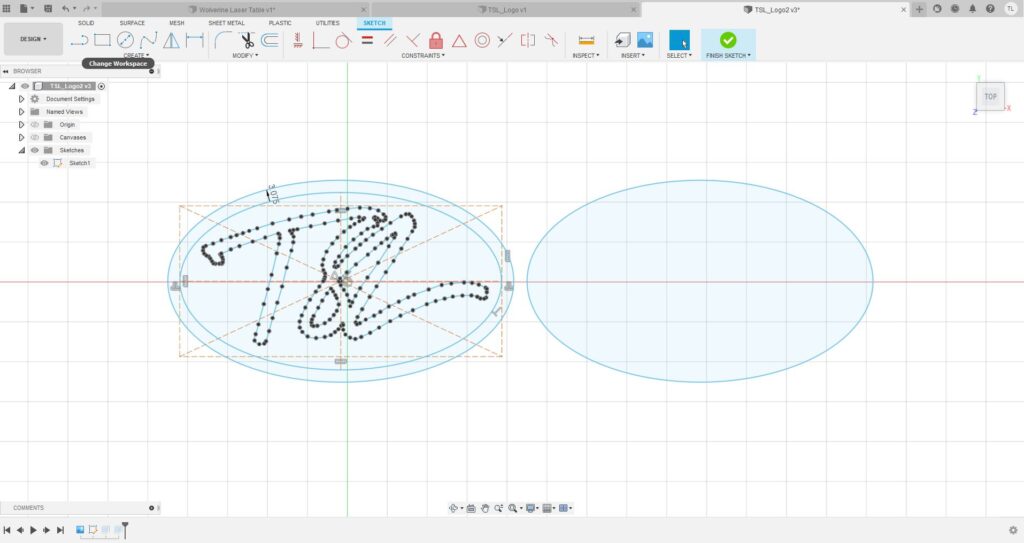
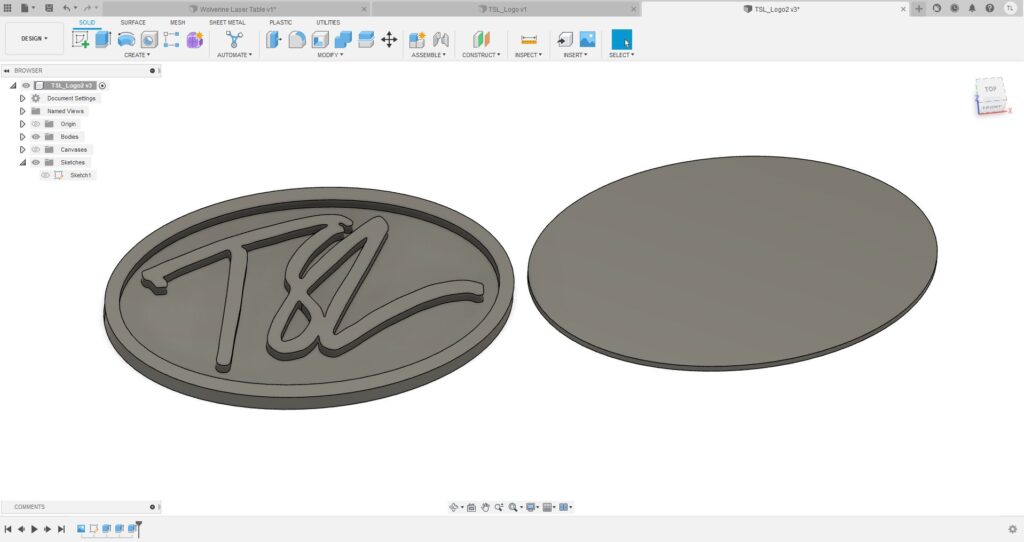
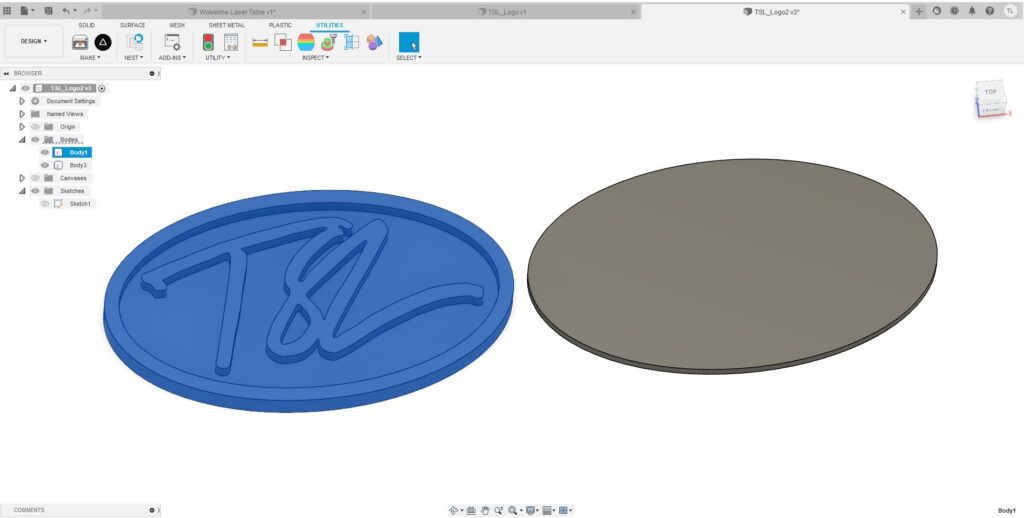
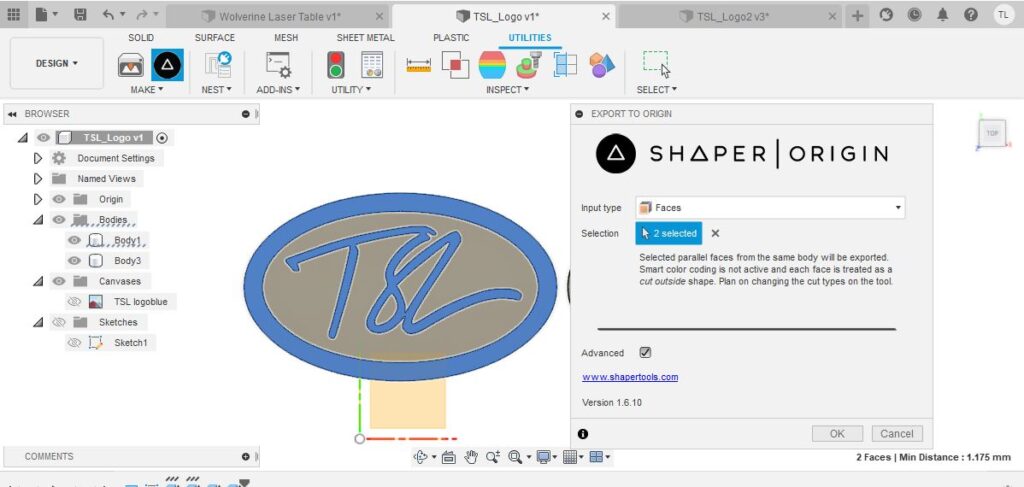
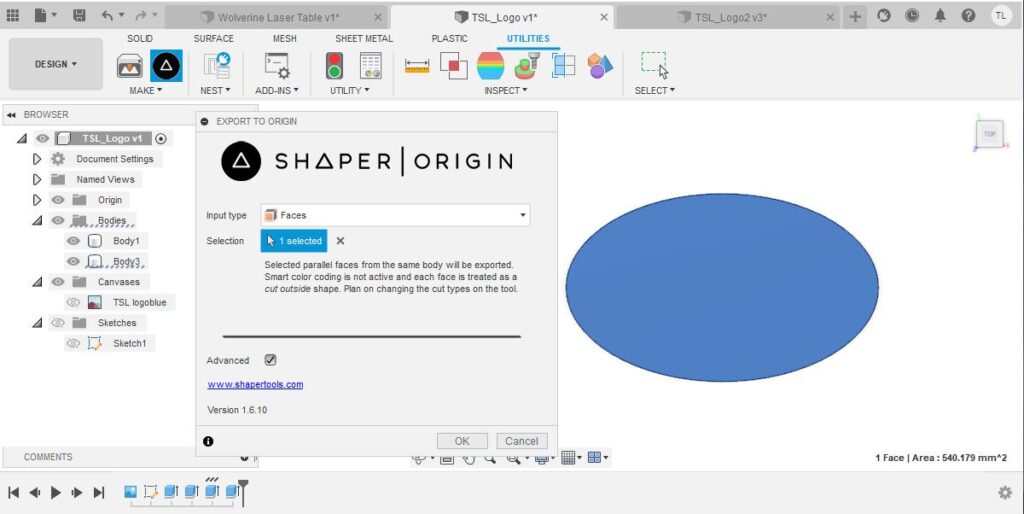
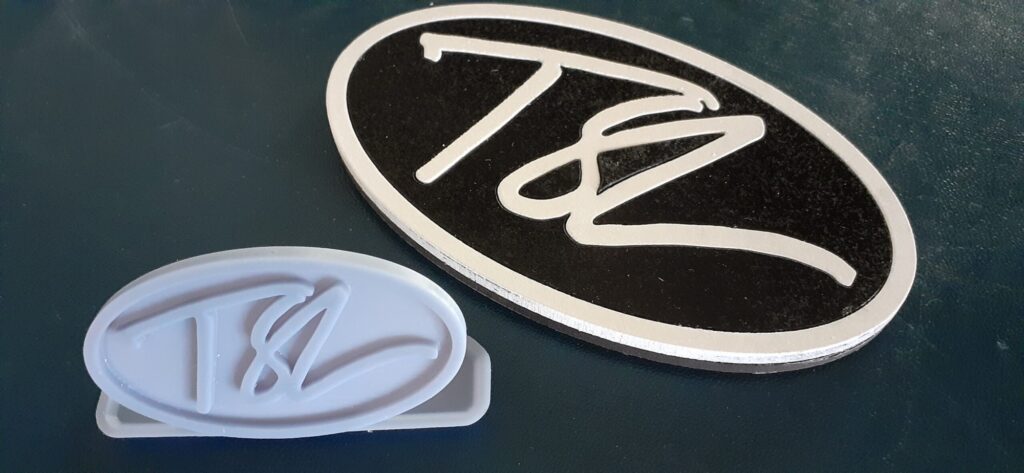
Using Fusion 360 to make .STL & .SVG files 1 Comment / Fusion 360 / By Tim Leishman Getting StartedI am using my initials to create a logo. I started by writing my initials TSL on a piece of paper with a Sharpie. Steps for creating an .STL file for 3D printing using Fusion 360:Insert a JPG as a Canvas in Fusion 360. Create a new sketch and outlined the initials with the Fit Point Spline tool. Hide the Canvas and find the center of the image. Add an Ellipse. Finish sketch and extrude. Right click the body and Save as Mesh. This will save as an .STL file for your 3D printer slicer software. Steps for creating an .SVG file for laser cutting using Fusion 360:Follow the previous steps and double click to re-open the sketch drawing and make a copy of the outer ring. Finish Sketch and extrude new body. Enter into the Utilities menu tab. Go to the ADD-INS and add the Shaper Utilities app. Select Input type as Faces. Select faces and click ok and save .SVG. Repeat for the second body.
Katie November 4, 2022 at 4:30 pm Nice content! Thank you for sharing these detailed steps and information. Reply

Nice content! Thank you for sharing these detailed steps and information.