This article is included in the ISTEM 2023 Series
- Unplug the Breadboard PS from the wall power adapter.
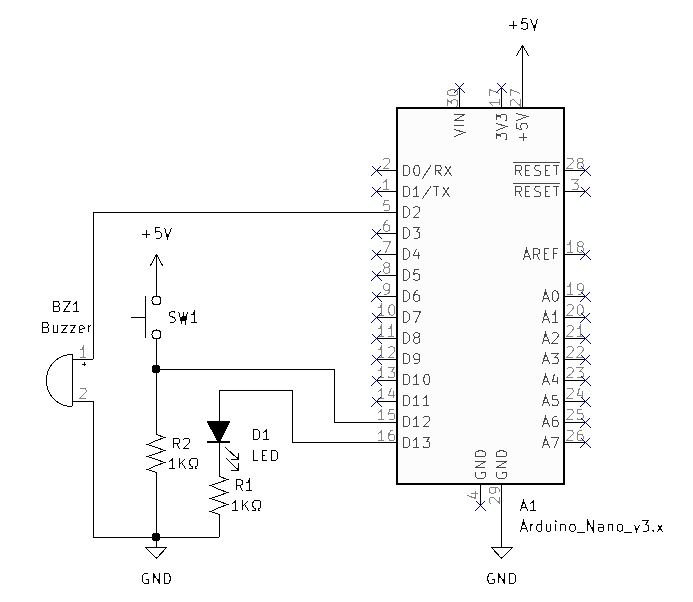
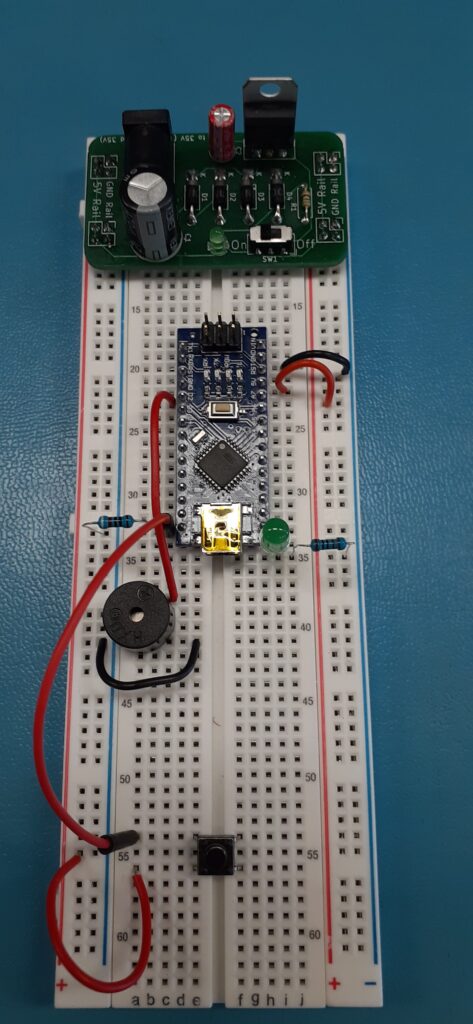
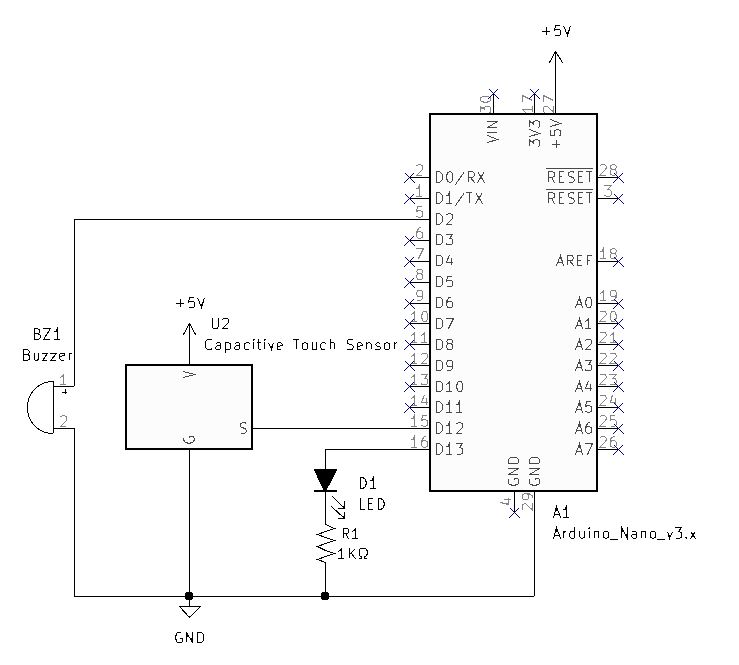
- Build the above schematic on your breadboard.
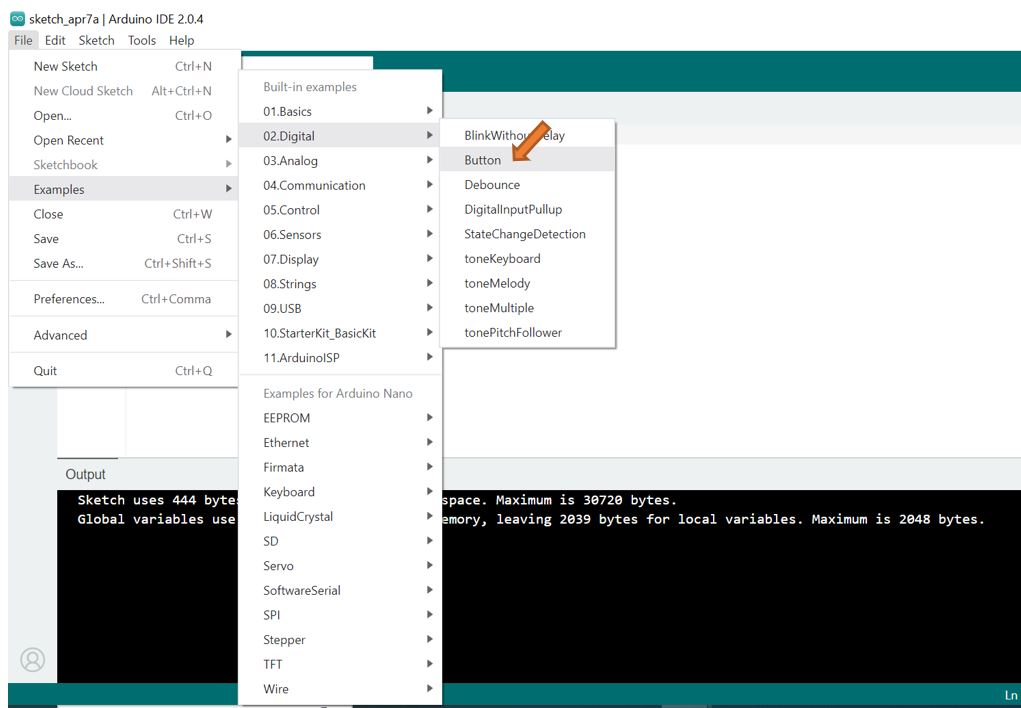
- Load the “Button” example code into the Arduino IDE.

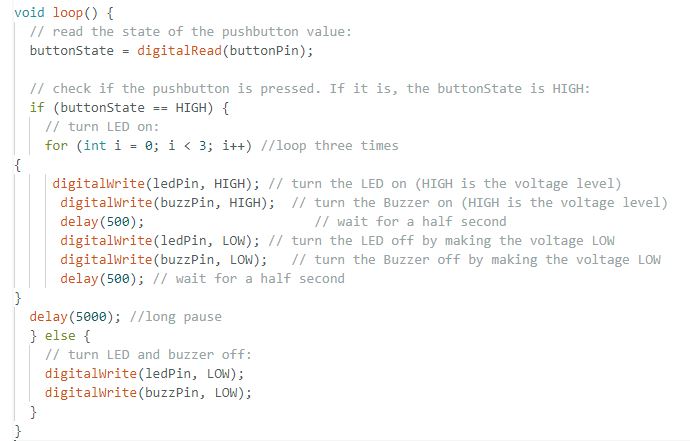
- Modify the constant buttonPin to equal pin 12 and add the constant buzzPin to equal pin 2 as seen above boxed in green.
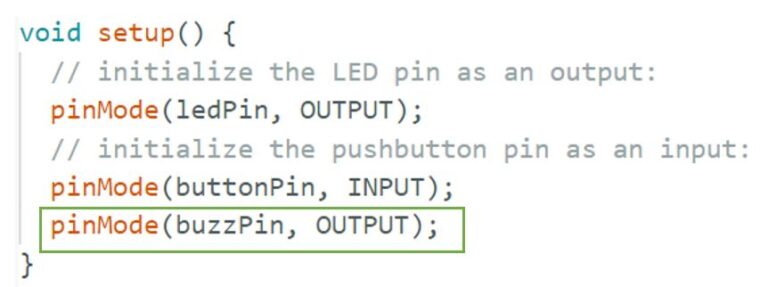
- Add the initialization of pin 2 “buzzPin” as an output as seen above boxed in green.
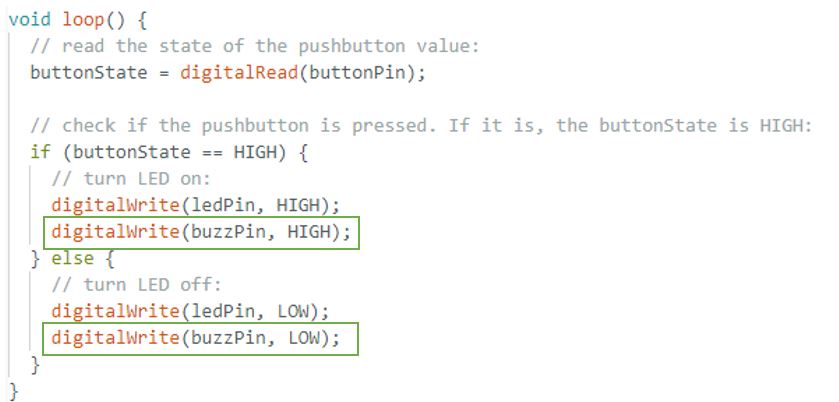
- Add the buzzPin to the If Else statement as seen above boxed in green.
- Verify the code by clicking the upper left checkmark.
- Upload the code to the Arduino Nano by clicking the upper left arrow.
- Verify LED lights and Buzzer alarms when the button is pressed.
- Disconnect from the computer and connect the wall adapter to the Breadboard PS.
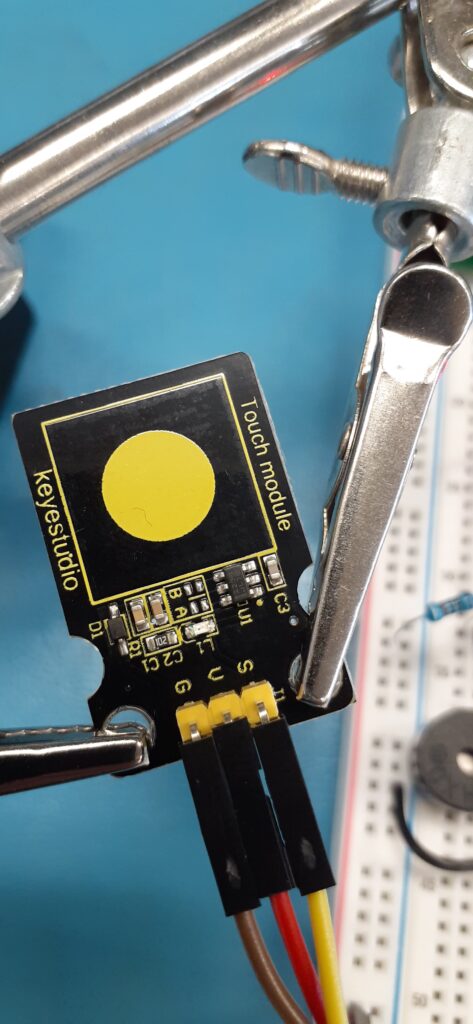
- From the Arduino Sensor Kit, locate the Capacitive Touch Sensor
- Reference the above schematic and reconfigure your Breadboard with the Capacitive Touch Sensor.
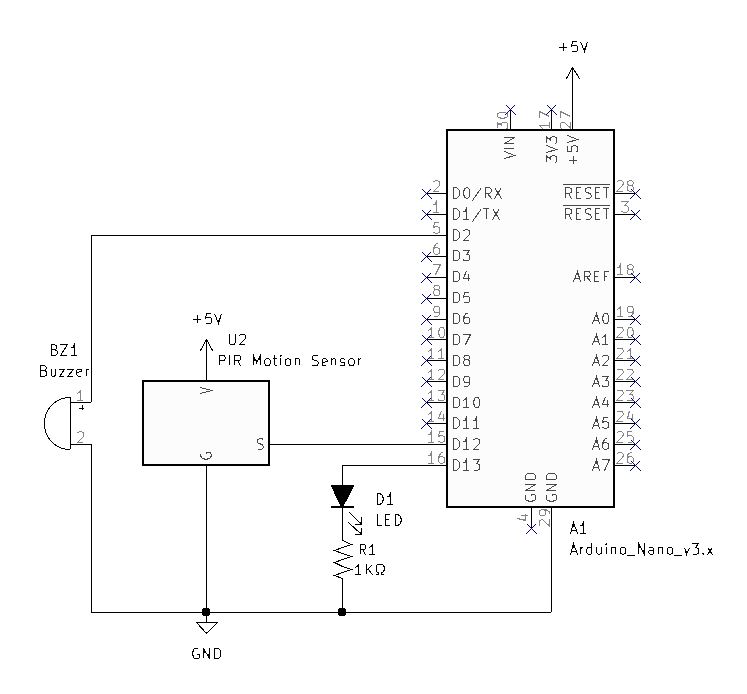
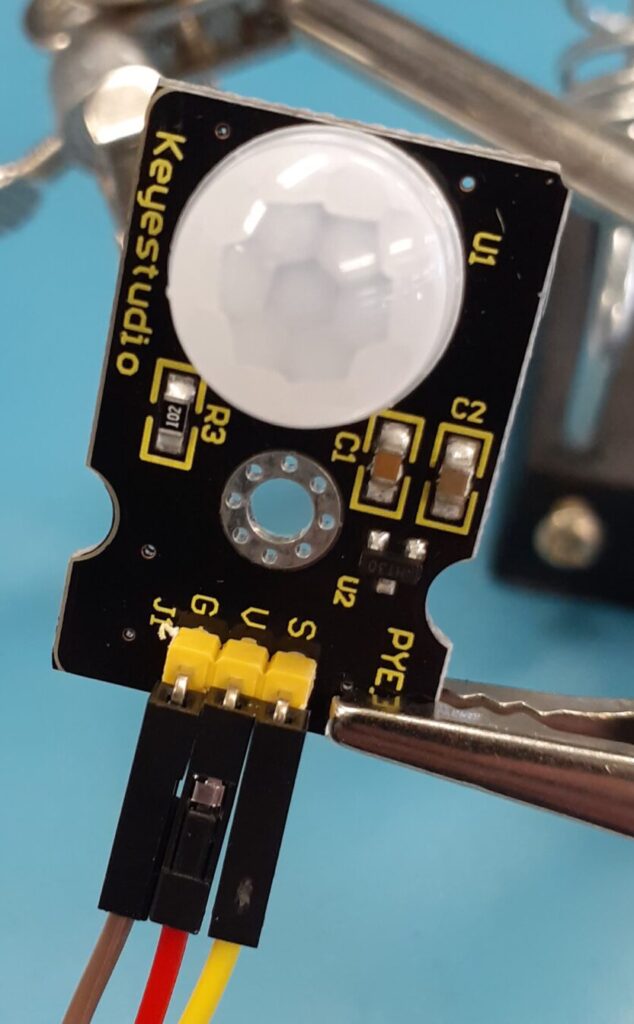
- From the Arduino Sensor Kit, locate the PIR Motion Sensor
- Reference the above schematic and reconfigure your Breadboard with the PIR Motion Sensor.
- Three Beep Code Challenge! – Try modifying the code so that the circuit gives three beeps, instead of the constant tone when the PIR is triggered.
