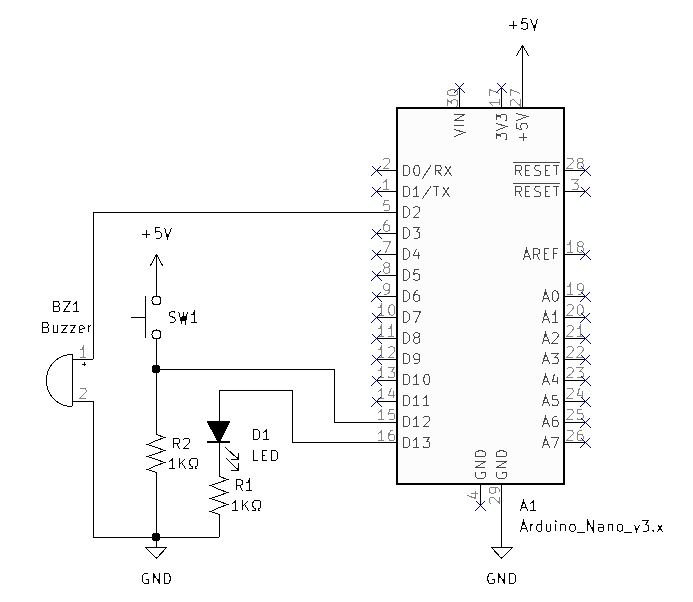
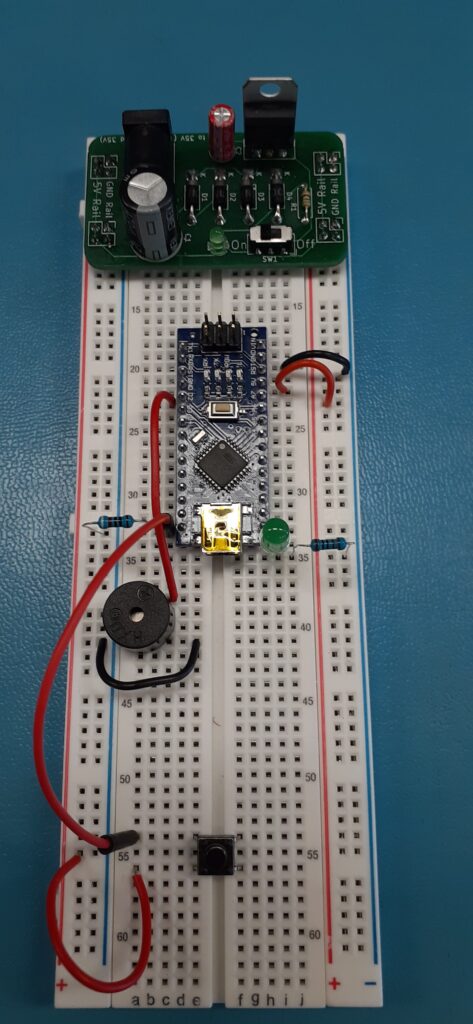
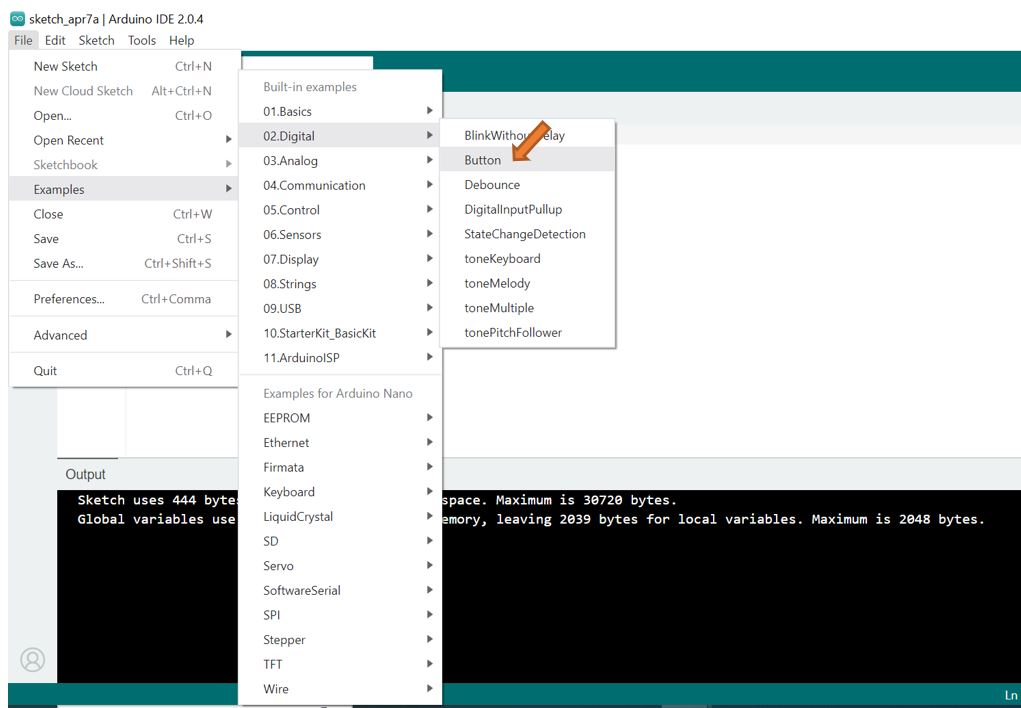
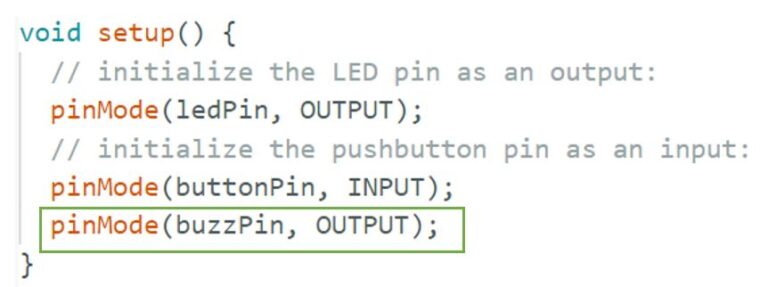
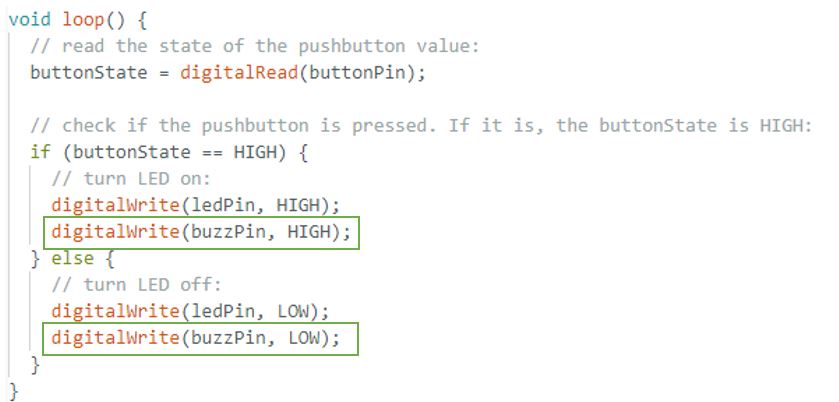
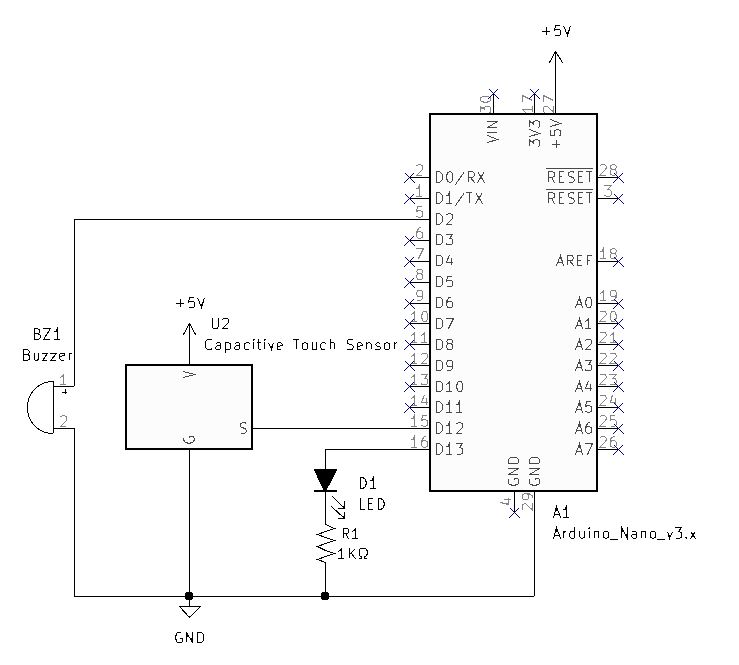
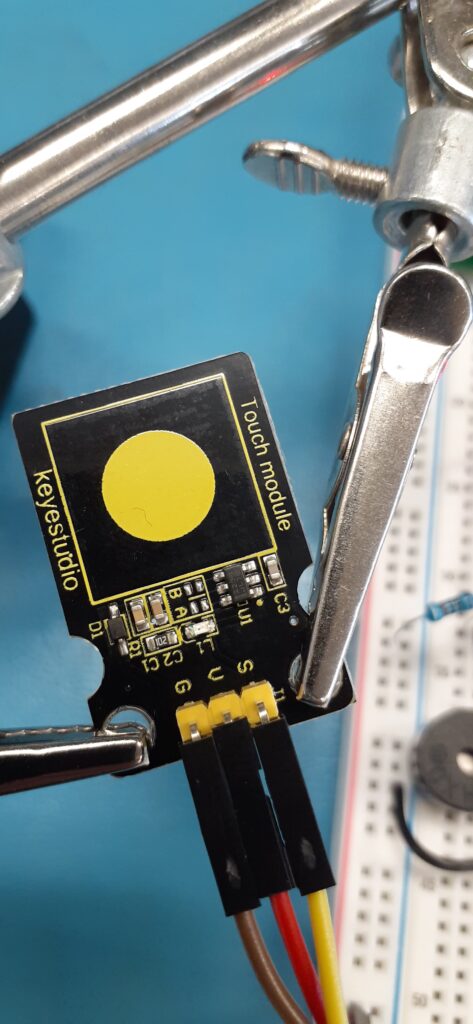
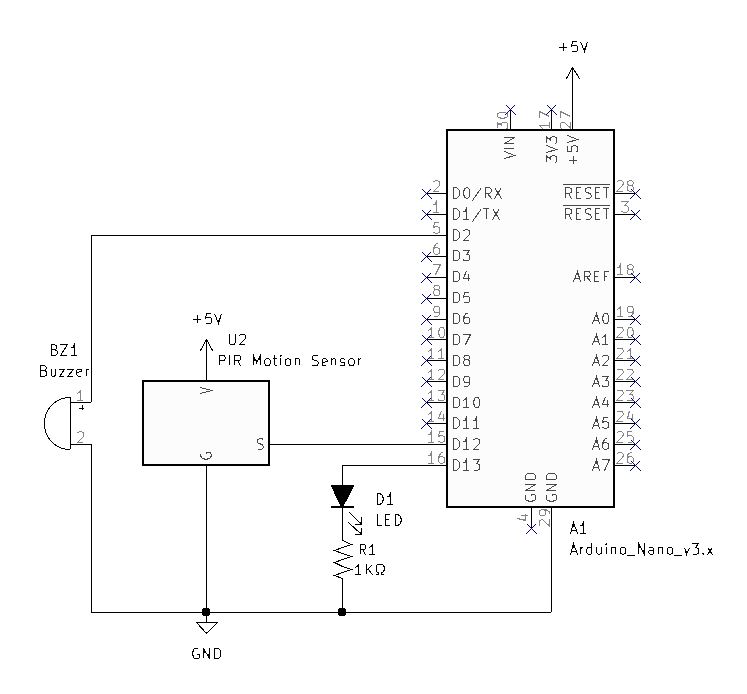
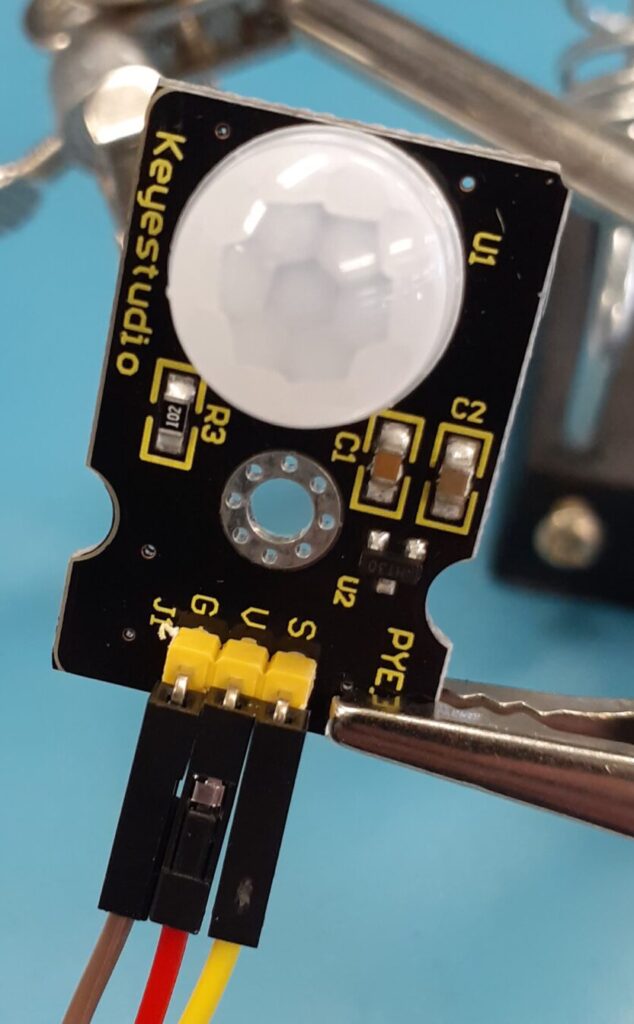
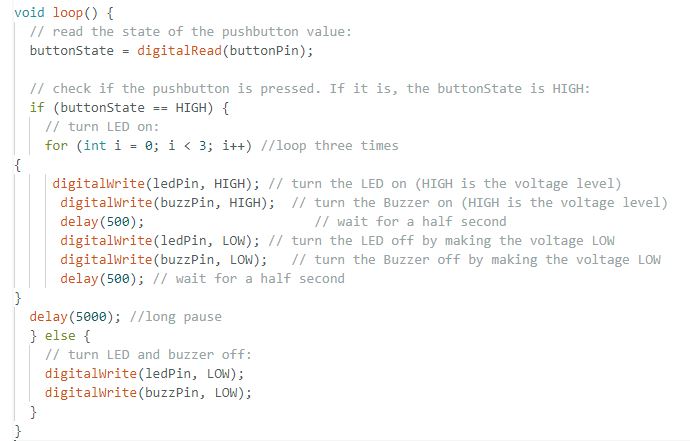
Aruino Nano Sensors 101 Leave a Comment / Arduino, Electronics, Programming / By Tim Leishman This article is included in the ISTEM 2023 SeriesUnplug the Breadboard PS from the wall power adapter.Build the above schematic on your breadboard. Load the “Button” example code into the Arduino IDE. Modify the constant buttonPin to equal pin 12 and add the constant buzzPin to equal pin 2 as seen above boxed in green. Add the initialization of pin 2 “buzzPin” as an output as seen above boxed in green. Add the buzzPin to the If Else statement as seen above boxed in green.Verify the code by clicking the upper left checkmark.Upload the code to the Arduino Nano by clicking the upper left arrow.Verify LED lights and Buzzer alarms when the button is pressed.Disconnect from the computer and connect the wall adapter to the Breadboard PS. From the Arduino Sensor Kit, locate the Capacitive Touch Sensor Reference the above schematic and reconfigure your Breadboard with the Capacitive Touch Sensor. From the Arduino Sensor Kit, locate the PIR Motion Sensor Reference the above schematic and reconfigure your Breadboard with the PIR Motion Sensor. Three Beep Code Challenge! – Try modifying the code so that the circuit gives three beeps, instead of the constant tone when the PIR is triggered.