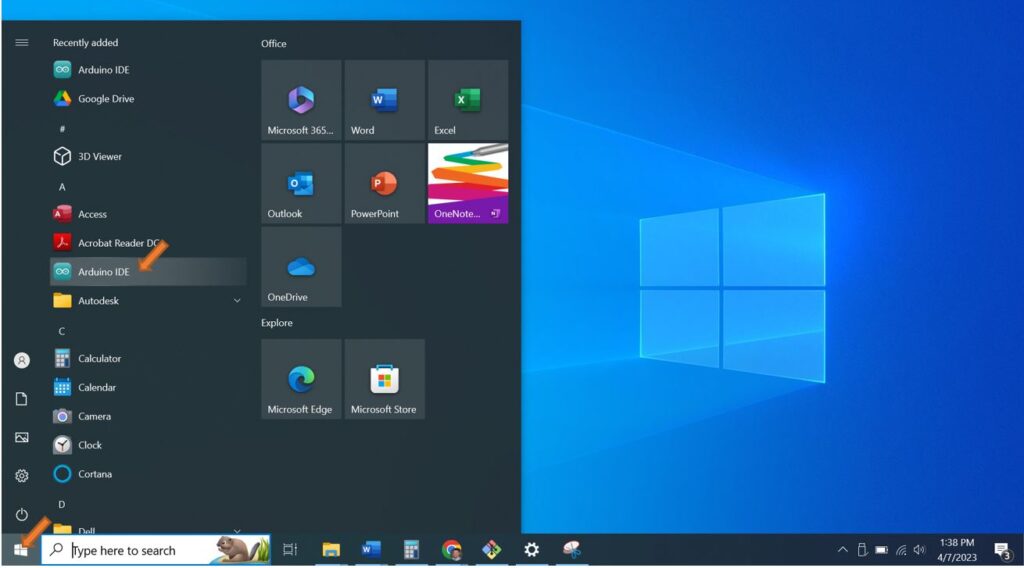
Start by opening the Arduino IDE application. Select the Windows Start Icon at the bottom left of the screen and select the Arduino IDE application.
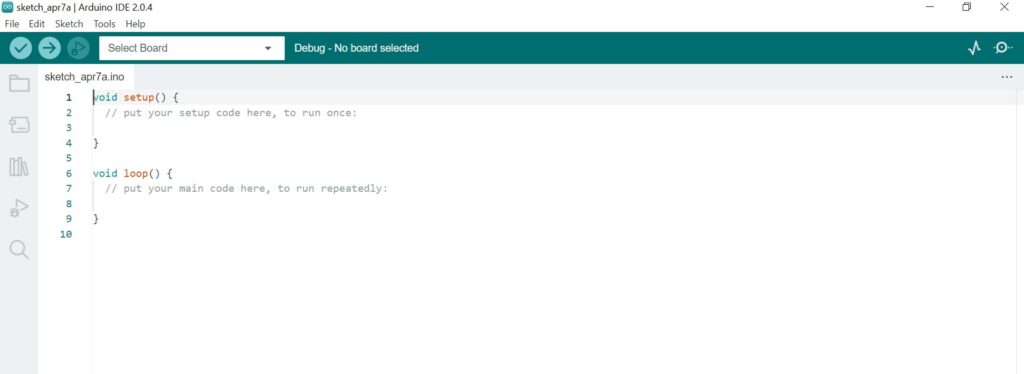
Arduino IDE at startup.
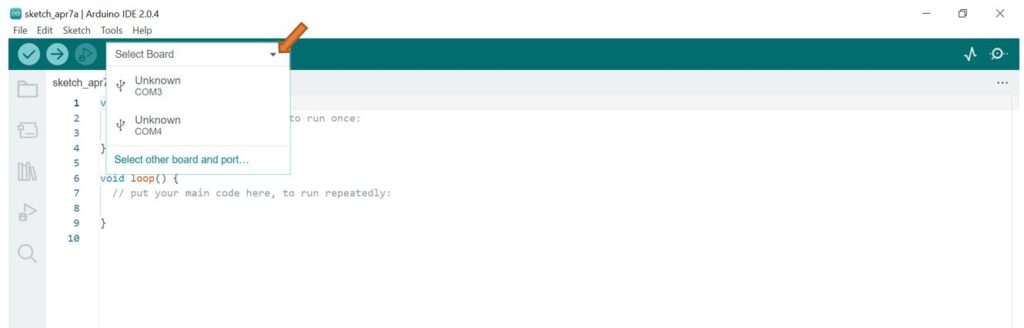
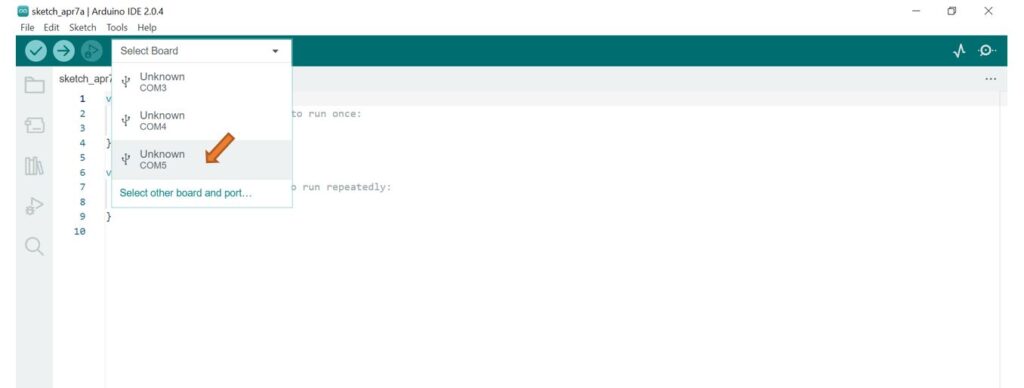
Select the “Select Board” drop-down and note the Unknown Com ports.
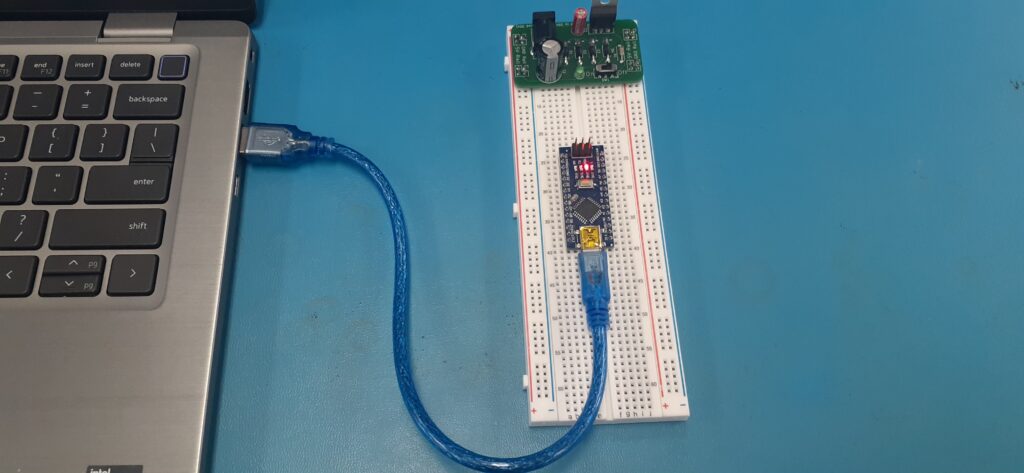
With the Breadboard Power Supply off and unplugged, connect the computer and Nano together using the USB cable.
Notice the power LED will light.
Notice a new Unkown Com port will show up on the Select Board drop-down.
To verify the correct port, try unplugging and replugging the USB cable. Watch for the port that disappears and reappears when the USB cable is disconnected and reconnected and select that port from the drop-down of the Select Board menu.
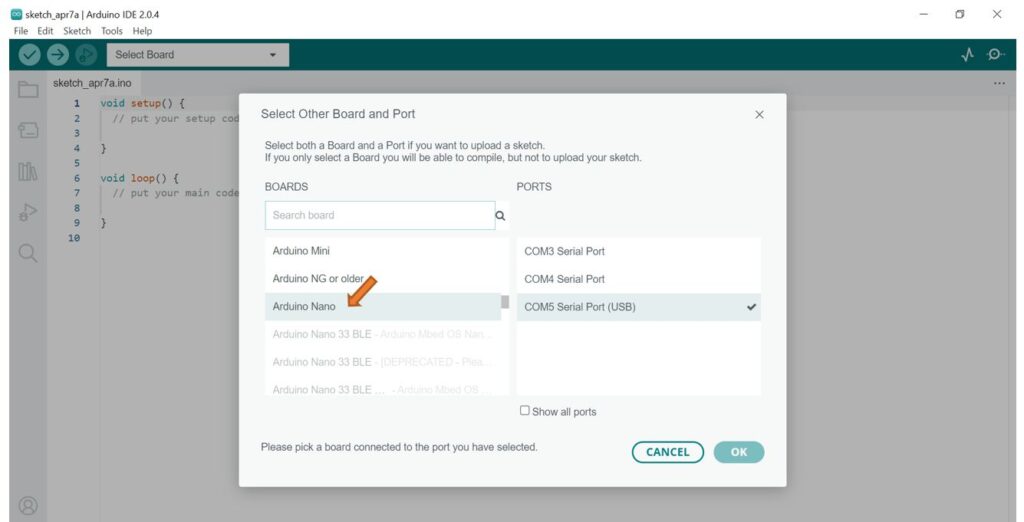
Select the Arduino Nano from the scroll-down list.
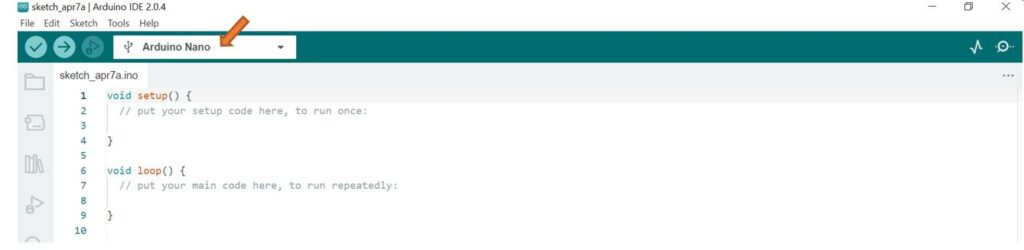
Verify Arduino Nano is now selected.
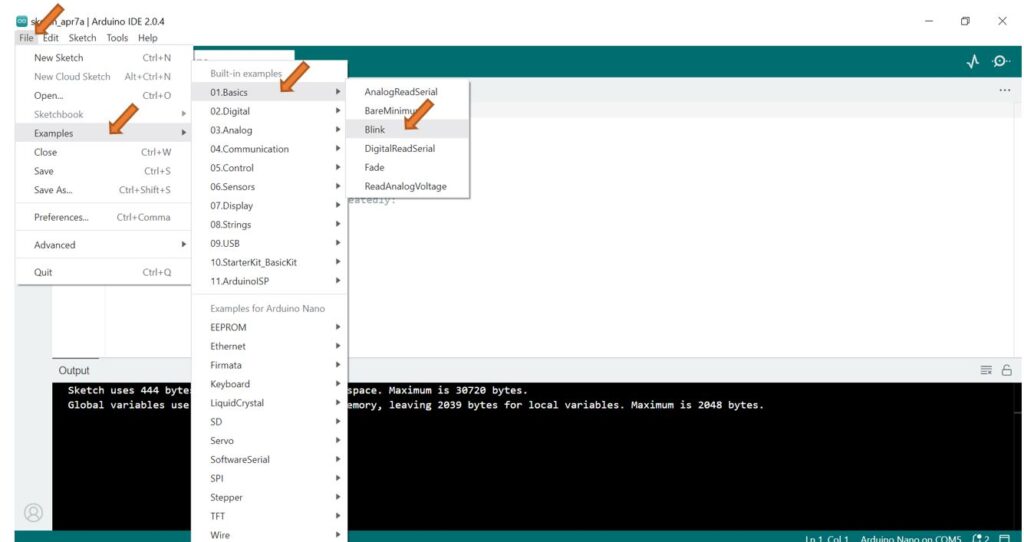
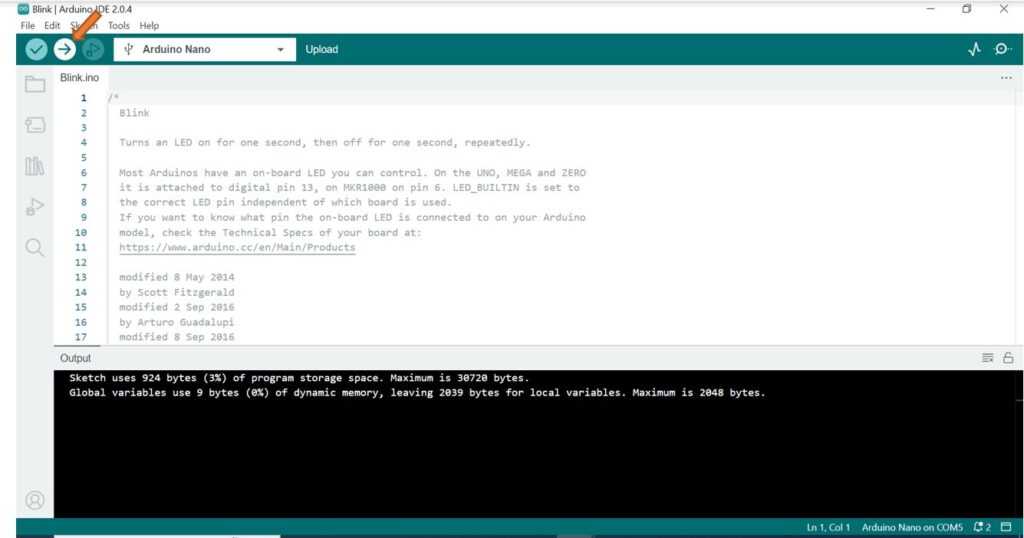
Select File, Examples, 01. Basics, Blink to load your first program.
Click the Check Code button – this feature will attempt to identify errors in the code.
Click the Upload button – this will upload your code to the Arduino Nano.
Observe the blinking LED.
Disconnect the USB cable from the computer and the Nano.
Connect the GND rail to the GND of the Nano
Connect the 5v rail to the 5v pin of the Nano
Connect your Breadboard Power Supply to power and turn it on.
Observe the Nano will power up and run the uploaded code – independently of the computer.